All of the secrets you need to do your own bathroom on a budget


This outdated bathroom was in desperate need of an update and it also needed to be done on a budget. We wanted to share all of the details of how we made this project happen. Not many things in this space were new, it just took some time and hard work to bring it to life. This post will show you how we dealt with wallpaper, existing tile floor, a cream tub shower insert and design details.


Wonderful Wallpaper
See all of the beautiful wallpaper?! The entire bathroom from floor to ceiling was covered including a matching border. I’m sure in its prime it was gorgeous! The wallpaper in this bathroom project was still very much intact and had not started peeling a bit. It was put on well! We didn’t want to take on the project of taking it all down, so we went with an easier option. We bought sheetrock joint compound and a sheetrock knife and covered each of the wallpaper and border seams. After one coat, we let it dry and then used sanding blocks to smooth the seams. After assessing the seams we went back with a second coat of the sheetrock joint compound on some areas that it was needed. After it was dry and sanded, we used an oil-based paint to put on the walls. You would never know wallpaper was under the paint! We did put two coats and used Agreeable Gray by Sherwin Williams.

Brand new tub and shower…kinda
The manor in which this tub and shower insert was located in this bathroom, we knew that it had the potential to be a project that could get pricey. It was built into the bathroom and there was no easy way of getting it out without spending more money to do so. We decided that refinishing the existing cream tub to a bright clean white was the best option. We used the company Miracle Method and they did a wonderful job! They removed the existing shower door, touched up any minor cracks and resurfaced it beautifully. This alternative was a great and easy option to update what was already there.

Old floor, new life
The floor of a space can really make or break the way that a room feels. Mauve pink tile adorned this bathroom and we knew that it had to be changed to create the updated look that we were going after. With keeping with the most budget friendly option, we did something that we had never done before…we painted the existing tile! We did not just paint with regular paint, but we used a two step system that went on beautifully. The paint that we used was Rust-Oleum Home Floor Coating. The first coat being the color paint and the second was a clear sealer coat. The reviews were great and we had a wonderful experience with it as well. We used the color Gray Owl for the floor and Bright White for the baseboard tiles.
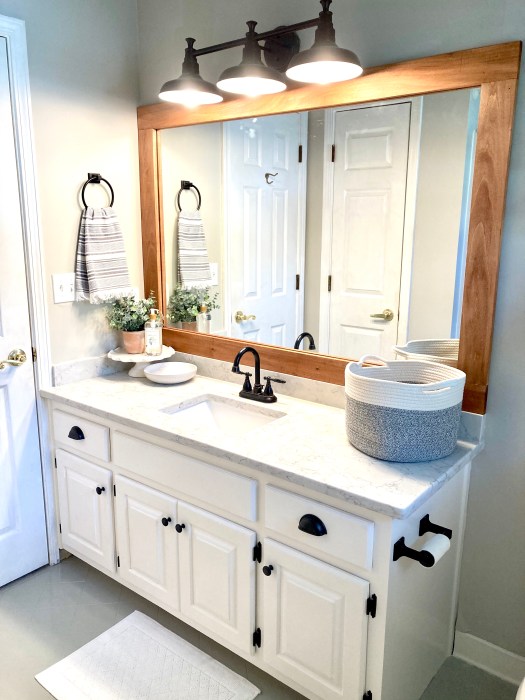
Vanity and Mirror Revamp
All this vanity needed was sanding, new paint and new hardware. We took off the doors to be sure that everything got sanded well by using sanding blocks. We used a semi-gloss paint in Snowbound by Sherwin Williams. New knobs and hinges were ordered in oil rubbed bronze to add to our updated vision for the bathroom. Above the vanity we wanted to keep with the budget friendly option for a mirror and so we decided to frame out the existing mirror. With all of the white and grey, we wanted to warm up the space with a wood trim out. We used one by four pine pieces of wood and cut them to size. The mirror frame was stained with the color Chestnut by Varathane.


Decorating Details
What ties a remodel or any new construction project together are the final details that you put into the project. To complete the vision we had for this bathroom, we were sure to pay close attention to the aspects that would wrap the project up. We had new countertops installed that we found at a discounted price, we added a new light and faucet, a new toilet and functional storage above the toilet. The items added to the counter were also functional pieces that could hold soap, jewelry and any toiletry bottles that would need to be out.
Remodels and updates do not have to break the bank! if you are willing to put in the time and work, you can make and old space in your home come to life! We hope these tips help guide you in your next home project.
